There are many legitimate reasons for wanting to convert DRM protected WMA files, and many feel they should be able to do so. Free Audio Editor features a professional audio recorder to record these protected files as they are being played in Windows Media Player. After recording, the recorder saves audio directly to MP3, unprotected WMA (using any desired profile), WAV (using any compression codec), OGG and more. This post will show you how to convert DRM Protected WMA.

How to Convert DRM Protected WMA (Remove DRM)
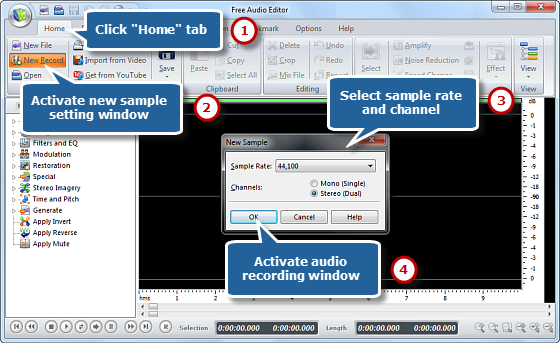
Step 1. Activate Audio Recorder
How to convert DRM protected WMA? Download, install and launch Free Audio Editor first. Click “Home – New Record” to select recorder sample rate & channel and click “OK” to activate audio recorder window.
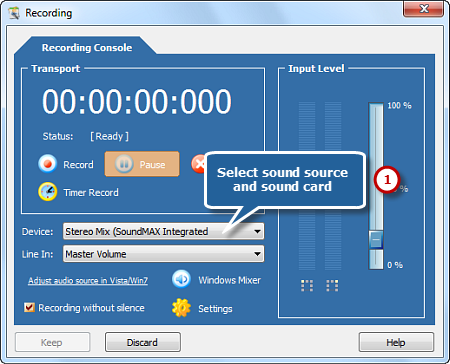
Step 2. Choose Sound Source and Sound Card
Choose a proper sound card and select the sound source in your system. The names of the sound source to record streaming audios maybe different in various operating systems, usually named as Stereo Mix, Phone Line, Aux Volume, Video Volume, Mic Volume, Line In, CD Audio and so on.
Tips: If you do not choose the correct sound source, no audio signal would be detected or recorded even if you can hear it.
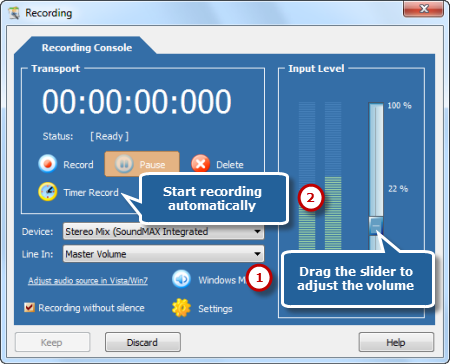
Step 3. Adjust Recording Settings
Start to play the audio file you want to record and you can see wave variations in the wave pattern. Drag slider to adjust the recording volume. Set a specific time by clicking “Timer Record” to automatically start recording. You also have the power to record without silence.
Tips: If the volume is too low, you can see only very small variations in the wave pattern. If the sound is being clipped off because the volume is too high, move the volume setting down until most of the volume range is displayed without clipping.
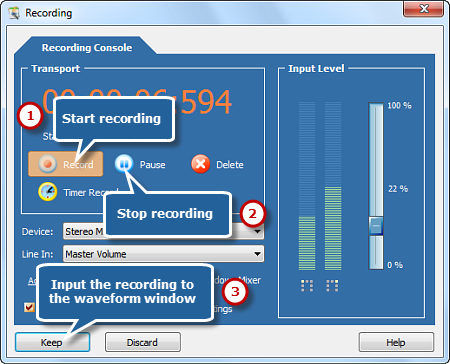
Step 4. Start Recording
After everything is set, click the red round record button to start recording. To stop recording, click “Pause”. Then, click “Keep” to input the recording to the waveform window of audio editor.

Step 5. Save the Recording
Now, the recording is displayed in the waveform window, you can edit it or add audio effects to meet your demands. You can just go back to the “Home” tab and click the “Save” button to save the changes to the original file or click “Save File As” to save the changes with a different file name and/or location. After that you can select the output folder and format as well as adjust the output quality. Now, enjoy the converted DRM music on your music player!
How to Convert DRM Protected WMA Differently?
Try DRM WMA to MP3 converter
If you want to gamble for a recently popular DRM WMA to MP3 converter to remove DRM from music, then give Noteburner audio converter a try. It is powerful because it supports many audio file formats. One of its key features is its capability to remove any kind of protected copyrights like DRM in WMA. Most of its users might think that it can only remove DRM from iTunes music, but in fact, this converter can also enable an audio file with DRM to be converted to any needed audio format. Now, just enjoy your DRM WMA file without restriction.

Conclusion
Unquestionably Free Audio Editor is one of the best audio editing software. Its interface is easy to navigate, which makes it accessible for users with any kind of music editing experience. It provides loads of editing functions, presets and effects to choose from. Plus, it constantly gets compliments on the output quality. Most importantly, Free Audio Editor can deal with any audio formats without a hitch. The file compatibility is a necessary attribute to have in the best audio editor.