An audio podcast is a good way to start a communicative repertoire with other people on the web. It’s also a good supplement to a blog, especially for readers who don’t have much time for in-depth analysis. Ever feel like sharing your voice over the internet? Use podcasts to interact with more people around the world and here we list what you need to do to create an audio podcast on your own.
Steps to Create An Audio Podcast
Step 1: Premise and Dedication
First, you need to nail down a premise: How is your podcast going to work for you? What do you want it to do for your readers? How long will it take? How many people participate, and is there anyone be your guest? Do you want to make it just as a talk-show, or a sound-scape with sound effects and BGM? Thus making a good organization will help you create an audio podcast much easier to understand.
Whether you want to make a short and simple podcast or a professional one, dedication is the key. Unlike blog posts, you have less time for tangents and you need to prepare the material for your talk. Although it takes time, effort, and a lot of dedication to finish, there is no need to be discouraged.
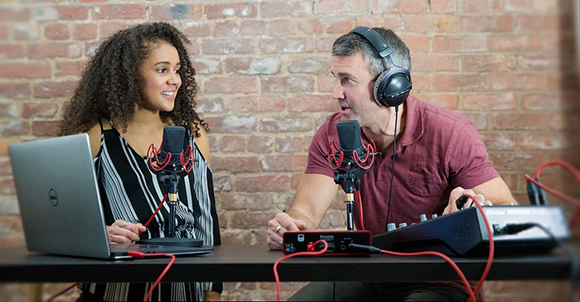
Step 2: Equipment
Here’s a list of equipment you will probably need:
Microphone
Preamp/Condenser/Hardware EQ
Computer
Audio Editor
Headphones
Stands for Mic
A microphone is undoubtedly the most important equipment for audio recording. There are two types of microphones: dynamic and condenser. The dynamic mic is more expensive, but it is good at isolating the voice for getting rid of background noises. A condenser mic is cheaper and it records your voice in more “natural” sound but it is more vulnerable to background noises. Depending on your budget, you can choose either of them for recording.
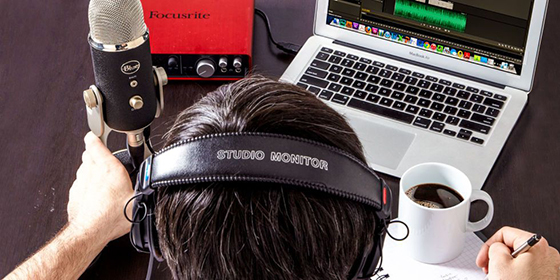
If you want to create an audio podcast, you will need a computer to handle audio processing. Getting a real preamp, a hardware compressor or hardware EQ will ensure you to get a good signal from the mic. As far as software goes, Free Audio Editor is a free, easy-to-use audio editor that also records very well. Good stands can dampen ambient feedback and keep your hands free from your computer. They can take the strain off of your neck and back.
Lastly, you will need a pair of headphones to hear what everyone is saying without it feeding back into the mic. In-ear monitor works well, or the over-the-ear is also ok, but you need to make sure it has decent quality.
Step 3: Setup and Recording
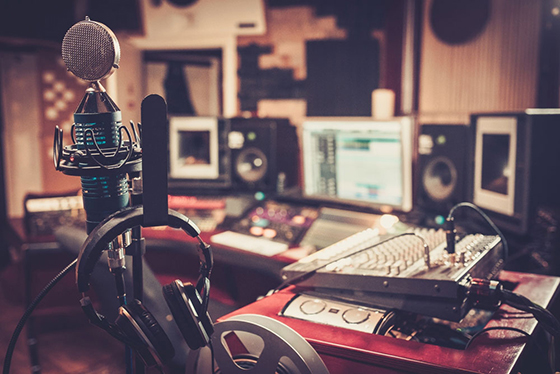
Once you’ve got an idea of your equipment, it’s time to designate your setup. You need a professional sound studio, a clear room where people can move, and talk without much background noise. Make your mic stand at the optimal place so that you can be free to keep a good posture. When you are recording, try to speak slowly and enunciate. Although you might mess it up, that’s fine. Because you need to cut or edit it later and just keep talking. You’d better leave some breaks, and if needed, you can record in different sessions. And lastly, just keep sipping water because talking can make you feel thirsty!
Step 4: Editing and Polishing the Audio
If you finishing the recording with good audio, then you just need to make some edits and cut out the errors. Usually, if your mic or recording settings can’t filter everything out, you should use some noise removal for a piece of clear audio. An even volume is also important for the track and the compressor effects will be needed for your audio polishing. Fortunately, Free Audio Editor gets everything you need for better music creation. It can be used as an audio editor and recorder with great simplicity. In Free Audio Editor, music processing has never been so easy if you know how it works.
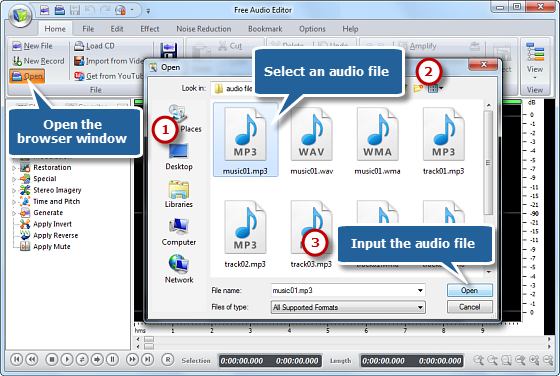
1. Go to “Home” tab, click “Open” to input your recording to edit. Then you will see the audio loaded in the waveform in the program window.
2. Choose a part to edit and there are 4 ways: use hotkeys, drag your mouse along the waveform, move the slider bar and set start/end/length time.

3. Navigate to “Edit” tab and there you are provided with a list of editing tools including cut, copy, paste, crop, delete, etc. If needed, “Undo” and “Redo” can be used to correct your editing. You can also apply various audio effects for polishing your editing.

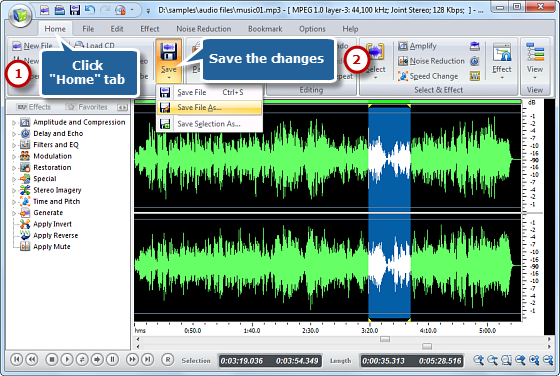
4. When you finish your audio editing, go to “Home – Save”. Choose one of the options for file saving: “Save File”, “Save File As” and “Save Selection As”. Finally, you will be prompted to set the output quality.
Finally, when you’ve edited your recording down to an organized piece of art, you will need to get people to listen to it. There are two parts: the hosting and the feed. Hosting is where the podcast comes from, whether from your website or storage space. Feeds are how it is accessed by a reader like iTunes. You can choose one of them according to your needs.